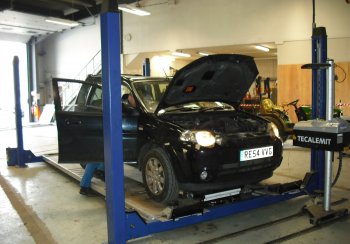
We want to support all vehicles to get through their MOT first time to help drivers avoid failure on what can be very basic issues. Here are some of the basic tips to avoid a first time failure.
Lights
Don't be one of the 20% of MOT failures which fall down because of a simple dead bulb. Remember to check all of your bulbs before your test. Get someone to help you - or park up close to a wall or garage and test them out. Check the following:
- Headlights (main beam and dipped)
- Sidelights (front and rear)
- Indicators (front, rear, and side repeaters)
- Brake lights
- Rear number plate
- Rear fog light (fronts are not checked - but check yourself anyway!)
- Hazards (check seperately from indicators)
The reverse light is not part of the MOT - but always worth checking.
Wheels and tyres
All tyres should be above the legal minimum tread of 1.6mm across three quarters of the tyre. There should be no damage - check for bulges, splits, or cuts to the sidewalls. Make sure the tyre size is the same for the rear and front tyres. Although a spare wheel is not a requirement for an MOT check - a 'space saver' spare fitted as a road wheel will not pass.
Windscreen
Chips of over 10mm in the driver's line of sight and over 40mm in the area swept by the wipers will result in a fail - as will any scratching that limits the drivers vision. Remember - get small stone chips repaired as soon as possible to stop them spreading any further. It might save you the price of a new windscreen!
Wipers & Washer jets
Make sure they are secure and are able to clear the windscreen for their entire length. Lift up and check the rubber for splits or general wear and tear. Of course, check they are safely attached to the wiper arm. Test the jets to make sure they work correctly - blocked nozzles can be cleared with a pin. Remember to top up your screen wash before you get to your test station! Similar principles apply to the fuel cap - this must be securely in place with the seal inside without splits or having crumbled away.
Exhaust
Check for holes (not the one at the end) and make sure it is held onto the vehicle securely. Listen out for the exhaust sounding louder than normal because there is a chance it could have a hole in it. Also, be mindful of a clunk of the exhaust when you go over a bump - it could be the rubber mounts having been worn and requiring replacement.
Body
Vehicle bodywork must be free from heavy corrosion, should not have sharp edges sticking out, and not be badly damaged. Make sure the front doors work from inside and outside. If you have rear doors, these must work so other parts of the test - like seat belt checks - can be completed. Check the boot and bonnet close securely.
Mirrors & Horn
These must be in place securely and not held to the car with string or tape. No glass should be cracked or smashed. Test the horn. Can someone outside the car hear it? If not, it must be loud enough to attract the attention of people on foot, cyclists, and other motorists.
Brakes
Although the testing of brakes needs specialist knowledge, you can still check that the rubber on all the pedals isn't worn away. If your car has ABS, a warning light should go out after you start the car. For the hand brake, this should hold the car on a hill.
Number plates
Ensure that these are secured properly to the car, not faded, not hidden by dirt, and not cracked. Check for standard letters and numbers with even spacing.
Seat belts
Give all your seat belts a sharp tug. They should latch, fasten securely and lock. Check they are in a good condition, not frayed or cut. Rock each of your seats to check they are bolted down and secure.
Emissions
If you haven't run your car for a while, or use it for mainly short town journeys, take it on a longer journey where a higher engine speed is sustained for a greater length of time. This could clear out the deposits in the engine before an emissions test.
